Peach Pie Bars
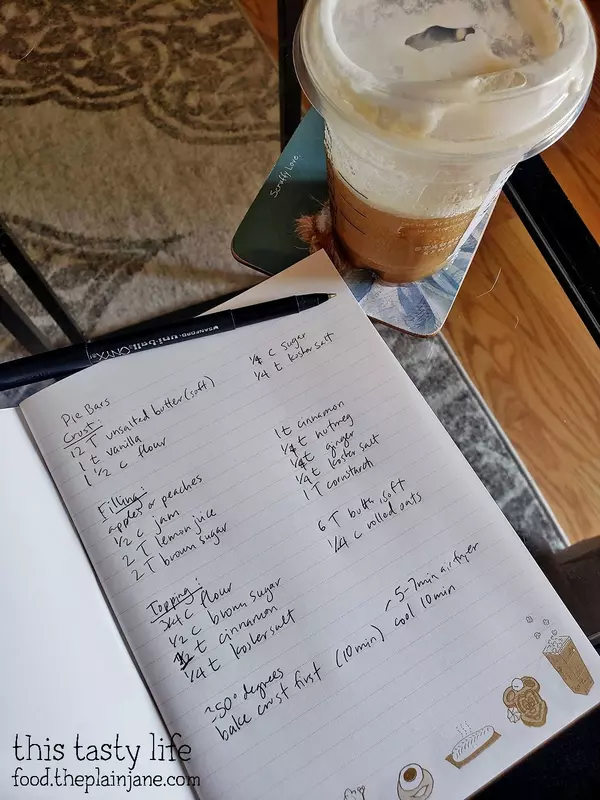
Hi friends! It’s been a long time since I posted on the blog though I have still been active on my Instagram and Facebook pages (@thistastylife). A lot has happened since I last posted in April (!) but instead of getting into all of that, let’s talk about dessert instead. I was watching Food Network on the Firestick the other day and on Girl Meets Farm, she made some Apple Pie Bars. I wanted to do something similar, but I wanted to do it with peaches instead. I also adjusted the filling and topping slightly more to my liking and viola – a new recipe! It’s a pretty simple one. These Peach Pie Bars start with a shortbread crust to form the “bar” part of this dessert. Then comes a lovely peach filling. You could also swap this for nectarines. Or plums. Or pears. Or apples! Then there’s a streusel topping that makes you feel partly like you’re eating a crumb top pie (or a crisp).It’s quite delightful and crazy simple to make this dessert. I highly recommend eating one of the Peach Pie Bars warmed up with a big scoop of vanilla ice cream. I like that this feels like you’re eating a bunch of different kinds of desserts all wrapped into one. The shortbread crust gives you cookie/bar feels, while the filling makes you think of pie, and the topping makes you think of pie or crisps! You can’t go wrong with this one, and I advise you make it stat. Peach Pie BarsIngredients Crust:12 tablespoons unsalted butter, softened1 teaspoon vanilla extract1 1/2 cups flour1/4 cup granulated sugar1/4 teaspoon kosher saltFilling:3 peaches, peeled and sliced2 tablespoons lemon juice2 tablespoons apple juice1/2 cup of jam (I used strawberry)1 teaspoon cinnamon1/4 teaspoon nutmeg1/4 teaspoon ground ginger2 tablespoons cornstarch Topping:3/4 cup flour1/4 cup old fashioned oats1/2 cup brown sugar1/4 teaspoon kosher salt6 tablespoons unsalted butter, softenedIn a bowl, mix together the ingredients for the crust. Use your (clean) hands to get in and squish the butter until it is well mixed into the dough. It will start to come together to form a ball. Place into a 8×8 baking pan (lined with parchment paper, if you have it). Bake at 350 degrees in an air fryer/convection oven for 8-9 minutes, or about 10-12 minutes in a regular oven, until golden brown. Let cool 10 minutes.Meanwhile, in another bowl mix together your fresh peaches with lemon juice and apple juice. Add in strawberry jam, cinnamon, nutmeg, ground ginger, and cornstarch. Stir to combine and pour on top of your slightly cooled crust. Grab yet another bowl (this is a recipe for using lots of bowls) and combine your flour, oats, sugar, salt, and softened butter. Again, mix and then use your hands to squish the butter into the mixture to make it form soft, crumbly mounds. Sprinkle this on top of your peach mixture.Bake at 350 degrees in a regular oven for 35 minutes. In an air fryer/convection oven, bake for about 25-30 minutes. Let cool and then slice into bars. Highly recommend eating it warmed up with a scoop of vanilla ice cream!

Fluffy Whipped Dalgona Coffee
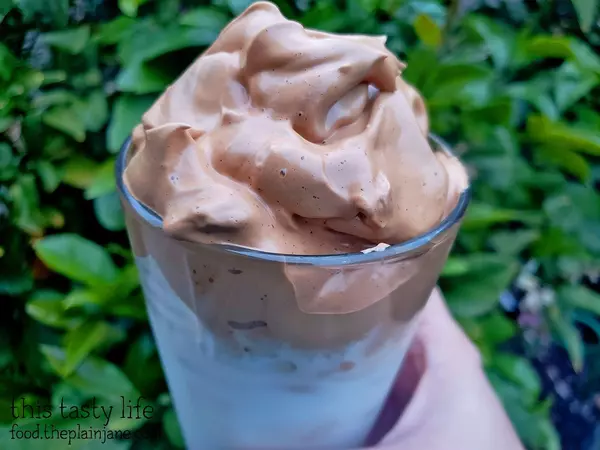
I jumped on the internet bandwagon and I made whipped coffee! The “official” name is Dalgona Coffee but I prefer “Fluffy Whipped Coffee” because I’m a weirdo.It basically looks like coffee whipped cream. I think everyone is going nuts for because A) it looks pretty B) it’s easy to make and C) it feels like you’re being extra indulgent and really nice to yourself making this treat. You really only need three ingredients to make this. Here you go:Fluffy Whipped Dalgona Coffee2 tablespoons INSTANT coffee (must be instant)2 tablespoons sugar (I read you can use a different sugar, but it’s recommended to definitely use sugar for it to stay “fluffy”)2 tablespoons boiling waterYou dump all three things into a bowl and get out your hand mixer (or stand mixer) and whip it (whip it good) for 5 minutes.It will change color and become this light, golden brown. You can also just use a regular whisk if you need an arm workout… good luck with that.Iced Whipped Coffee:Fill a glass with 8oz of milk (oat, almond, silk, 2%, whatever floats your boat) + iceTop with the fluffy whipped mixture you just made. Take a photo.Then ruin it by mixing it together properly. Ha.Hot Whipped Coffee:Same as above but warm your milk first! Step by Step VideoCheck it out on my Instagram Story by clicking here.I didn’t realize that the photos I saw of it all over the internet were just for show. You actually need to mix this together and you need some mixing ROOM. So pour it into a bigger cup/vessel so you can properly mix this up. The whipped coffee won’t be fluffy anymore. Sorry.Here’s how it actually looks after mixing. It’s like having a coffee milkshake. It’s a little sweeter than I like but it was still tasty. I wouldn’t have this every day but it is a really fun break and it’s awesome to see how fluffy the whipped coffee gets! I recommend trying it!

Savory Scones with Cheese, Garlic, and Herbs
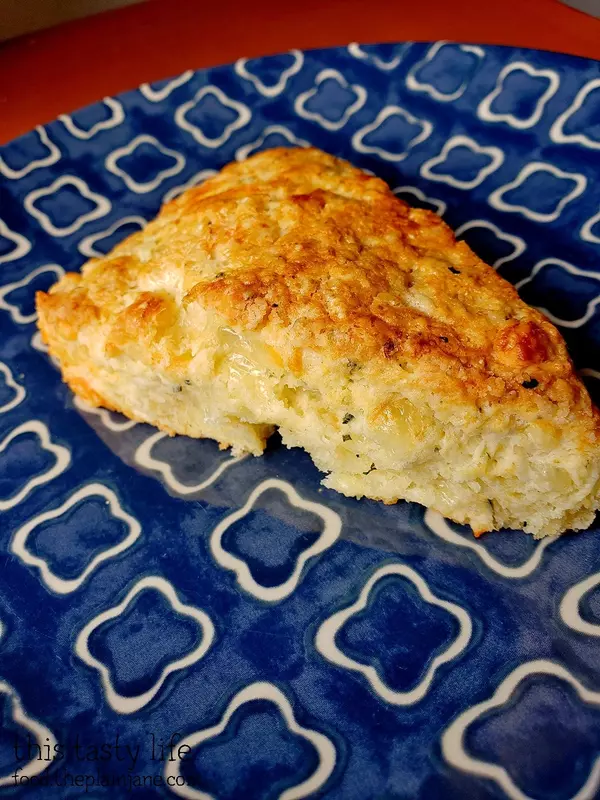
Since we are now ordered to stay at home and practice social distancing, I have a lot more time on my hand. Enter: Savory Scones with Cheese, Garlic, and Herbs. I wanted to make scones but I didn’t want sweet ones. I decided that some fresh herbs from the garden along with a heaping bit of garlic and cheese would just be the trick to for these savory scones.These turned a lovely golden brown and had pockets of cheesy goodness. Helloooo!I’m going to do a semi step-by-step thing. You can just skip to the end for the recipe, too.Making Savory SconesFirst step was to freeze some butter for about an hour and then use a grater to get it into tiny little pieces.The butter was then cut into a flour mixture until it resembles coarse crumbs.Next I added both fresh and dried herbs and garlic.Cheese Time!Plus cheeeeeese!Cheddar would be a fine choice but this is what I had on hand.Next, cream and egg get mixed together to form some magic.I kinda skipped a few photos… but basically you stir the dough together and then dump it out on a floured surface and bring it together to form a ball. You want to handle the dough as little as possible at this point.If the dough is too sticky, add more flour in.If it’s too dry, add some more cream or milk in. Form it into a circle and pat it together.Let the dough chill for 15 minutes.Heat up the oven and then after the time out is up, cut into wedges and place onto a tray with parchment (or baking mat)Brush the tops of the scones with cream.Bake until your kitchen smells heavenly. Pull these golden brown suckers out and enjoy a few minutes of savory scone bliss.Savory Scones with Cheese, Garlic, and HerbsIngredients2 cups all-purpose flour, plus more for hands and work surface2 tablespoons granulated sugar1/2 teaspoon salt2 and 1/2 teaspoons baking powder1/2 cup (1 stick) unsalted butter, frozen1/2 cup heavy cream (plus 2 Tbsp for brushing)1 large egg1 tablespoon fresh herbs (oregano, rosemary, thyme, or sage)2 teaspoons herbs de provence 2 teaspoons grated garlic3/4 cup shredded cheeseInstructionsFreeze yo butter for about an hour. Then using a grater, shred the butter.Mix together flour, sugar, salt, and baking powder. Set aside.Using a pastry cutter or some forks, cut the butter into the flour mixture until it resembles coarse crumbs. In a measuring cup, beat your egg into your heavy cream.Add fresh and dried herbs, garlic, and cheese to your flour mixture.Add liquid ingredients into the dry and mix with a spoon until it comes together.Flour a surface and dump your dough out. If it’s too wet, add a little more flour in. If it’s too dry, add a tablespoon of milk or cream.Pull the dough together until it’s one big lump. Form it into a disk. Be sure to handle the dough as little as possible but also make sure all of the flour is incorporated! Wrap the dough and chill for 15 minutes.Preheat and set oven to 400 degrees.Take out the precious dough and place it on a baking sheet with parchment paper. Brush the tops with heavy cream.Bake for 20 minutes or until golden brown. Let cool, or, eat immediately and burn the roof of your mouth but think that it was totally worth it.
Categories
Recent Posts


